Slow Cooker Sweet Potato Dhal

Wow, so, I had a tough time writing this up. I posted this recipe on my instagram in January for MiniMoFo, but I just could not get my blog to work! It just refused to load. I’ve finally figured a work around, and fingers crossed this will post. I’m sorry you have had to wait so long for this recipe!

dhal2

This recipe is all about warmth, and warming yourself up and keeping cosy when it’s cold outside. Now, it’s the final part of February now, and here’s hoping that it’s not going to be too cold from here out, but, you never know. And there will always be cold days.

This is actually a slow cooker recipe! My slow cooker is very under utilised, I seem to always forget it exists, but it’s a very forgiving way to cook, and it makes the house smell absolutely gorgeous. For this dhal recipe, you just put all the ingredients in the slow cooker, and cook. No other pots and pans are needed. If you want any “croutons” on top, like I’ve done with the cashews in the picture, you can do them separately, but if not, it’s delicious on its own.

dhal1

I cooked my dhal on “high” in the slow cooker for four hours, but I know not everyone works with that time frame, and if you’d rather set it in the morning and leave it till night, you can put it on “low” for 8 hours instead and it should be just as good!

Slow Cooker Sweet Potato Dhal


Ingredients

  • 1 onion, chopped
  • 2 cloves garlic, chopped
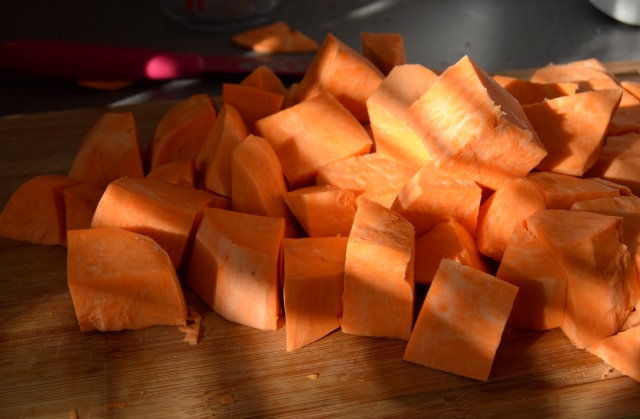
  • 3 sweet potatoes, diced into bitesize chunks
  • 1 tsp cumin
  • 1 tsp ground coriander
  • 2 tsp garam masala
  • 1 tsp turmeric
  • pinch cayenne (to taste, however spicy you like it!)
  • pinch salt
  • 150g red lentils
  • 1 can chopped tomatoes
  • 1 can coconut milk
  • 300ml vegetable stock

Directions

  1. Place all of the ingredients in the slow cooker.
  2. Turn the slow cooker to “High” for 4 hours, or “Low” for 8 hours.
  3. Check for seasoning, and serve.

Jammy Devils

This month’s MiniMoFo theme is “Literary Inspiration”. If you know my reading habits, you’ll know I am a huge Discworld fan. I’ve even used the series in a previous VeganMoFo post! If you’ve not read Discworld – what are you waiting for? Terry Pratchett’s writing is astounding in its ability to be both fun and serious at the same time, to involve so much detail and yet be enjoyable to read, and to ultimately make you feel at home in his world.

Ankh-Morpork, the central city in the Discworld books, may remind you slightly of London, or perhaps some other city in which you grew up, just with magic and trolls. This recipe hails from there, adapted from Nanny Ogg’s Cookbook (yes, there is a Discworld cookbook) where it is described as “hot, sweet, and cheap. Just the thing for a snack in the middle of a night shift”. Now, I don’t know about night shifts – but I do know these are great for that warm, cosy feeling you get as the nights are drawing in and winter is looming in the background. There’s something about jammy desserts that gives off a relaxing vibe.

jammydevils

Now, I used a few different sorts of jam for these cookies, because I always have jam around and I thought it’d be fun to try several flavours, but you could just use one flavour if you like. I love how these look like kind of jewels on the plate!

jammydevils1

One thing to be aware of when making these biscuits is – don’t put too much jam on them! You want enough that you can taste it, but if you put a giant dollop on, then it’ll pour over the edge of the biscuit and burn in the oven – and burnt jam is not very nice. Just make a little dip in the middle of the biscuit, and fill that with jam, and then you’ll have lovely not-burnt biscuits!

Jammy Devils

  • Servings: 20 biscuits
  • Print

Ingredients

  • 150g vegan butter
  • 120g icing sugar
  • 1 tsp vanilla extract
  • 1 tbsp cornflour (cornstarch in the US)
  • 250g plain flour
  • 2-3 tbsp vegan milk
  • approx 4-5 tbsp jam

Directions

    Preheat the oven to 180C/355F/Gas Mark 4
  1. Begin by creaming the butter and sugar together until smooth and well mixed.
  2. Stir in the vanilla extract.
  3. Sift in the flour and cornflour and mix to form a soft dough, adding the milk a tablespoon at a time if necessary.
  4. Place tablespoon sized balls of dough on a lined baking tray, evenly spaced.
  5. Using your finger, or the back of a small spoon, make an indentation in the middle of each biscuit.
  6. Add a small amount of jam to each divot – not so much that it overflows, just enough to fill the dip.
  7. Bake in the preheated oven for 15-20 minutes, until the edges are turning golden brown.
  8. Allow to cool on the baking tray.


Vegan Chocolate Chip Cookies

Is there much better than a freshly baked chocolate chip cookie? Not really. Cookies are perfect to just eat as they are, or to bake up and take to an event. That’s where these cookies come in – and this month’s MiniMoFo too! These cookies are great to pack up and eat outdoors, I took them to a family do and everyone enjoyed them.

cookies

I’ve spent years perfecting my chocolate chip cookie recipe. I’ve cycled through many variations – ones that are soft and cakey, ones that are crispy, ones that are all brown sugar, ones that are all white….and so on. All of which are good, but they’re not this recipe. My husband even declared this to be his favourite, which is quite a compliment!

cookies1

The idea for these cookies actually came from Reddit, of all places, where I saw a recipe that used a mixture of baking powder, water, and oil as an egg replacer. They mixed it all together and then poured it into the dough, but I found it worked just as well – if not better – put straight into the mixture.

cookies3.jpg

These cookies are perfectly crispy on the outside, and soft and chewy on the middle. When you first take them out of the oven, they look a little puffed up and underbaked – but don’t worry! Leave them on the tray for five minutes and they turn into the delicious cookies you can see in the pictures.

Vegan Chocolate Chip Cookies

  • Servings: makes 30 cookies
  • Print

Ingredients

  • 175g vegan butter
  • 200g brown sugar
  • 150g white sugar
  • 1.5 tsp baking powder
  • 1 tbsp oil
  • 2 tbsp water
  • 0.5 tsp bicarbonate of soda
  • 1 tsp vanilla
  • 350g flour
  • 200g chocolate chips

Directions

    Preheat the oven to 170C/340F
  1. Begin by creaming the butter and sugars together until light and fluffy.
  2. Add in the baking powder, oil, and water, and stir until well combined.
  3. Mix in the vanilla and bicarbonate of soda.
  4. Stir through the flour until you get a stiff dough.
  5. Fold through the chocolate chips until well distributed through the cookie dough.
  6. Place walnut size balls of dough on baking trays, leaving space for them to expand.
  7. Put in the preheated oven for 13-15 minutes, until golden brown. Remove and leave to cool on the trays for at least 5 minutes.
  8. Store in an airtight container for up to a week.

Strawberry White Chocolate Bars

I am absolutely loving the amount of fresh fruit that is in season right now. Strawberries, blueberries, raspberries, cherries… all sorts of delicious little morsels to snack on. Which is why it’s exciting that this month’s MiniMoFo theme  is fruit. Fruit is something that can sometimes seem a little uninspiring and “healthy”, but it can also sometimes seem exciting and fresh and tasty!

I’ll start off by saying, if you’re looking for a super-healthy fruit recipe… this is not your place. But I imagine most of you know that by now. This recipe is sweet and tasty, stuffed full of lots of strawberries (it’s a great recipe to use any you haven’t got round to eating yet) and topped with a gorgeous white chocolate crumble.

strawberry1.jpg

If you’re in the UK, you can get vegan white chocolate fairly cheaply from Tesco or Sainsbury’s, and the Co-Op do white chocolate buttons in their free-from section too. Or you can splurge and buy the wonderful iChoc white chocolate which is absolutely delicious.

The way I “crumble” the chocolate actually was born out of my laziness. I like to make chocolate chip cookies but sometimes I have difficulty finding vegan chocolate chips, so I often use a bar of chocolate chopped up for chunks. In my laziness, however, this sometimes translates to me bunging the bar of chocolate in the food processor and blending a few seconds to chop it up. Once, I blended a few seconds too long and ended up with crumbled chocolate…and it works perfectly in this recipe.

strawberry6

The crumbled chocolate gets mixed with flour, (vegan) butter, sugar, and oats to make a crumbly topping for the strawberry bars. You bake the shortbread first, then top with the strawberries, then the crumble, and finally bake again until it’s nice and golden brown.

strawberry5

The strawberry topping is made by chopping strawberries, mixing with a little vanilla and sugar, and leaving them aside to macerate for half an hour. This allows some of the juices to drain so they’re not too soggy for your bars. Then you drain the juice (keep it – it’s tasty!) and put the strawberries on top of the cooked shortbread.

These bars should be kept in the fridge because of the fresh fruit, and they’re delicious on a warm sunny day, such as the one we’re strangely having right now in the UK!

Strawberry White Chocolate Bars


Ingredients

    For the Shortbread
  • 150g vegan butter
  • 80g sugar
  • 1 tsp vanilla extract
  • 225g plain flour
  • 35g cornflour (cornstarch in the US)
  • pinch salt
  • For the Strawberry Filling

  • 500g strawberries, roughly chopped
  • 100g sugar
  • 1 tsp vanilla
  • For the Crumble

  • 150g vegan white chocolate, blitzed in a food processor to a crumbly texture
  • 50g vegan butter
  • 25g oats
  • 50g brown sugar
  • 100g plain flour

Directions

    Preheat the oven to 175C/350F
  1. First, make the shortbread. Cream together the butter and sugar until well mixed, then mix in the vanilla.
  2. Add the flour, salt, and cornflour to the butter/sugar mix and combine. The mix will be quite dry and crumbly – use your hands to bring it together into a dough.
  3. Press the dough into a baking tin – mine is 9×13 inch – and squash it down to make it level.
  4. Bake the shortbread in the preheated oven for 25 minutes, or until lightly golden brown.
  5. While the shortbread is baking, prepare the strawberries. In a large bowl, mix together the chopped strawberries, the sugar, and vanilla. Set aside for 30 minutes, and then drain the liquid off.
  6. Next, make the crumble topping. In a bowl, add all the crumble ingredients and rub together with your fingers until it resembles coarse breadcrumbs. Keep in the fridge until you are ready to use.
  7. Once the shortbread is baked, spread the drained strawberries on top of it, making sure to cover the biscuit evenly.
  8. Sprinkle the crumble topping over the strawberries, again covering it evenly.
  9. Place back in the oven for a further 30 minutes until the crumble is golden brown.
  10. Cool in the tin, then slice and serve! Store in the fridge.


Very Chocolatey Chocolate Cake

Mmm, chocolate. One of the great wonders of the world. Many people think that if you go vegan, you can’t have chocolate anymore, but thankfully that is not true at all! If you know me, you’ll certainly know chocolate is not off the cards. Chocolate is one of my favourite foods, and so for this month’s MiniMoFo I’m sharing my favourite recipe for chocolate cake.

chocolatecake3

Rich, melt in your mouth cake is generously coated in a smooth, sweet chocolate buttercream, giving you a delicious treat worth remembering. I have made this cake for so many special occasions – it’s great as it is, or served with a scoop of ice cream, but you can also use the base cake recipe and ice it however you fancy! I’ve decorated it with oreos, honeycomb, and even strawberries before.

chocolatecake

The cake is made extra chocolatey by having both cocoa powder and melted vegan dark chocolate in the batter. Lots of dark chocolate is vegan – I get mine from Lidl – but check the ingredients to make sure there’s no sneaky milk in there!

The icing also has melted chocolate in it, which means it’ll set up firmer than regular buttercream, so make sure you spread it once you’ve made it – if you put it in the fridge it’ll harden up and, whilst it’ll be tasty, it won’t spread on your cake.

Vegan Chocolate Cake

  • Servings: Makes a 2-layer 9-inch sponge
  • Print

Ingredients

    For the Cake
  • 420g plain flour
  • 1 1/2 tsp baking powder
  • 60g cocoa powder
  • 1 tsp bicarbonate of soda
  • 1/2 tsp salt
  • 500ml dairy-free milk (I use oat milk)
  • 2 tbsp cider vinegar
  • 130ml sunflower oil
  • 210g sugar
  • 2 tsp vanilla extract
  • 150g vegan dark chocolate, melted
  • For the Icing

  • 100g vegan butter
  • 600g icing sugar
  • 15g cocoa powder
  • 100ml dairy-free milk
  • 1 tsp vanilla
  • 180g vegan dark chocolate, melted

Directions

    Preheat the oven to 170C/350F
  1. First, make the cake. Sift the flour, baking powder, cocoa, bicarbonate of soda, and salt into a large bowl.
  2. In a smaller bowl, mix together the milk and the cider vinegar. Leave for a minute to thicken.
  3. Into the milk mixture, add the oil, sugar, and vanilla extract. Whisk with a fork until well combined.
  4. Slowly pour the wet ingredients into the dry until well mixed through.
  5. Next, add the melted chocolate to the cake batter and stir thoroughly.
  6. Pour the cake batter evenly into 2 lined cake tins, and place in the preheated oven for 30-35 minutes, until a knife inserted into the centre comes out clean.
  7. Leave to cool in the tins for ten minutes, then transfer onto a wire rack to cool.
  8. Once the cakes are completely cool, make the icing.
  9. Begin by combining the butter, cocoa, and a third (200g) of the icing sugar in a large bowl. You can use an electric whisk, or just mix it really well by hand.
  10. Add in another third of the icing sugar, mix well again.
  11. Add in the final third, the milk, and vanilla, and beat until completely combined.
  12. Finally, mix through the melted chocolate, beating until the icing is light and fluffy. If it’s too thick for your liking, add a little more milk, if it’s too thin, a little more icing sugar.
  13. Spread icing on the top of one of your cooled cakes, and place the second cake on top of it.
  14. Place a large spoonful of icing on top of the top cake, and spread it around the top and sides of the cake. Repeat until the icing is used up and/or the cake is covered to your liking!

Perfect Roasted Sweet Potatoes

sweetpots3

This month’s MiniMofo is all about favourites. I had to think long and hard about this, because it’s surprisingly difficult to narrow down your favourite food. Eventually I decided on my favourite vegetable: sweet potatoes! And I combined that with my husband’s favourite food: roast potatoes!

Now, if you’re British, no doubt you’ve had roast potatoes a fair bit. Part of Sunday dinner, or Christmas dinner, right? Perfect morsels of deliciousness – crispy on the outside, soft and fluffy on the inside – yum! Usually, of course, you use white potatoes for roasties, but I wanted to be a bit different…

sweetpots2

These are done in pretty much the same way as regular roasties, but incase you haven’t made those, I put together a little pictorial.

sweetpots6

First, peel your potatoes, and cut them into chunks – about an inch and a half in size. Not too big, but not small either. They don’t have to be super even, that’s part of the fun.

sweetpots5

Next, put them in a large pot of boiling water, and boil for 5 minutes. Then drain them immediately – you don’t want them to cook too long!

sweetpots4

Once they’re drained, pop them back in the saucepan, put the lid on, and give it a good shake. Hold the lid down well, or you’ll get flying potatoes everywhere. You want them to be all roughed up on the edges, this helps them get that nice crispy roasted outer.

sweetpots1

Finally, place them in a roasting dish, toss with salt, pepper, and vegan butter or oil, and put in an oven preheated to 210C/410F for 40-45 minutes. And that’s it – you’re done!

Roasted Sweet Potatoes


Ingredients

  • 600g sweet potatoes, peeled
  • 2 tbsp vegan butter, melted, or sub oil of choice
  • Salt + Pepper

Directions

    Preheat the oven to 210C/410F
  1. Chop your potatoes into chunks about an inch and a half in size.
  2. Bring a large pot of water to the boil. Once boiling, carefully add your chopped potatoes.
  3. Place the lid on the pot, and boil covered for 5 minutes, then drain immediately.
  4. Return the drained potatoes to the pot (off the heat), put the lid on, and give it a good shake. You want the potatoes to be roughed up at the edges.
  5. Next, tip your potatoes into a roasting dish, and toss with salt, pepper, and your butter/oil.
  6. Place the roasting dish in the preheated oven for 40-45 minutes, until golden and crispy, tossing once halfway through.
  7. Serve however you like!

You can make these into garlic roast potatoes easily – add 5 cloves of garlic (whole) to the roasting dish at step 5 – it’s delicious!

Vegan Lemon Drizzle Cake

Once again, I am bending the rules a little bit for this month’s MiniMoFo. The prompt is “in season”, and this post uses lemons, which are never in season in the UK because we don’t grow them here. However, lemons are, to me, fresh and summery and make a great introduction to the spring season. Signalling the departure from warm, spiced, wintery foods, a sharp and sweet lemon cake is perfect to welcome in (hopefully) sunnier weather.

lemondrizzle

Lemon drizzle cake is a classic British cake, usually baked in a loaf tin, which gives a big lemony kick by including lemons in the sponge, and a glaze that’s poured on top of the hot cake once removed from the oven. My recipe also has an extra bit of lemon in the icing that tops it!

lemondrizzle1

The important thing with this cake is to pour the glaze on top whilst the cake is still hot. Take it out of the oven, leave it in the tin, and then pour the glaze on top. It looks like you are pouring a lot of liquid on the cake and you probably think you are drowning it, but it all gets absorbed into the cake, creating a lovely sticky lemon taste. Then, you leave it to cool completely in the tin, before removing and drizzling with the icing.

A few steps – but totally worth it. Slice this cake and serve with a nice cup of tea – or lemonade if you want to go all out with the lemon!

Lemon Drizzle Cake

  • Servings: 1 loaf cake
  • Print

Ingredients

    For the Cake
  • Zest of 1 lemon (1 tbsp)
  • Juice of 2 lemons (5 tbsp)
  • 190ml vegan milk (I used almond milk)
  • 200g plain flour
  • 1 tsp baking powder
  • 1/2 tsp bicarbonate of soda
  • pinch salt
  • 60g vegan butter, melted
  • 100g sugar
  • For the Glaze

  • Juice of 2 lemons (5 tbsp)
  • 75g sugar
  • For the Icing

  • 75g icing sugar
  • Squeeze lemon juice
  • Water if necessary

Directions

    Preheat the oven to 170C/340F
  1. In a bowl, mix together the milk, lemon juice, and lemon zest. Set aside.
  2. In a separate bowl, sift together the flour, baking powder, bicarb, and salt.
  3. Into the milk mixture, add the melted butter and sugar, and whisk with a fork until well combined.
  4. Gradually pour the wet mixture into the dry, mixing until it’s all thoroughly stirred in.
  5. Pour the cake batter into a lined loaf tin, and bake in the preheated oven for 35-40 minutes, until a knife inserted into the centre of the cake comes out clean.
  6. Towards the end of the baking time, begin making the glaze.
  7. In a small saucepan, combine the sugar and lemon juice. Place on low-medium heat, and stir until the sugar completely dissolves and the mixture begins to bubble. Keep warm.
  8. Once you have removed the baked cake from the oven, pour the glaze evenly over the cake. It will look like a lot of liquid – but it will sink in!
  9. Leave the glazed cake to cool completely before removing from the tin.
  10. Once cool, make the icing. Mix together the icing sugar with a squeeze of lemon juice, and enough water to make a thick runny icing.
  11. Using a spoon (or a piping bag), drizzle the icing over the cooled cake.
  12. Store in the fridge.

Cheese-Stuffed Spicy Bean Burgers

Back again with another recipe for March’s MiniMoFo – this time a savoury recipe!

burger

Burgers! While technically I guess a burger is a patty stuffed into a bun, this isn’t actually what the “stuffed” element of this post refers to. These burgers are cheese stuffed!

Vegan cheese, of course. I use Sainsbury’s Caramelised Onion Cheese – also known as Gary – which I like because it’s kinda like having caramelised onions inside your burger and how cool is that? But you could use any vegan cheese you like, that comes in block form, since you’ll need to cut it into little blocks to stuff your burgers with.

burger3

The burgers are fairly simple bean burgers, based off my Spicy Bean Burgers from years ago, and can be adapted to suit your own spice level (just add more or less chilli!). In the burgers in the photos, I used black beans, but kidney beans also work really well in this recipe too.

burger5

To make the burgers, simply split the mixture into eight pieces (in half, then half again, then half again!). Take one piece and make it into a round disc in your hand (see picture above). Place a piece of cheese in the middle of the disc.

burger6

With another piece of mixture, create another disc, just like the first one, and put it on top of the first one with the cheese. Push down the edges to seal it all in. Then you’re done – you can fry the burgers now!


Cheese-Stuffed Spicy Bean Burgers


Ingredients

  • 1 onion, chopped
  • 2 cloves garlic, chopped
  • 1 large chilli, chopped (use more or less, to your taste)
  • 2 medium carrots, grated
  • 1 tsp cumin
  • 2 tsp smoked paprika
  • 1 can black or kidney beans, drained
  • 2 tbsp tomato puree
  • 1 tbsp soy sauce
  • 40g oats
  • 100g breadcrumbs
  • Vegan cheese, cut into four 2cm x 1cm rectangles
  • Oil for frying
  • Fixings for your burger – cobs, salad, mayo…

Directions

  1. Begin by heating oil in a large frying pan, and frying the onion, chilli, and garlic for 5 minutes, until translucent.
  2. Add in the grated carrot, cumin, paprika, and salt and pepper for seasoning, and fry five more minutes, until the carrot is soft.
  3. Meanwhile, in a bowl, mash the beans until no whole beans are left.
  4. Stir in the tomato puree, soy sauce, and oats.
  5. Once the onion and carrot mixture is done, add it to the bowl with the beans, and mix.
  6. Stir through the breadcrumbs to form a mixture that should hold together when you press it.
  7. Split the mixture into 8 pieces. (For photos, see above)
  8. Take a piece of the mixture, and form it into a round disc. Place a piece of cheese in the middle of the disc.
  9. Take another piece of the mixture, also form it into a disc. Place it on top of the first piece, and press down the edges to seal the cheese inside.
  10. Repeat until you have 4 patties stuffed with cheese.
  11. Heat oil in your frying pan over a medium heat. Once hot, add the burgers.
  12. Fry for roughly 5 minutes on each side, until crispy and golden.
  13. Serve in cobs with salad!


Bourbon Biscuit Brownies

These brownies are both biscuit and brownie. Not in the way that my brookies were a cross between a brownie and a cookie, but in the way that they’re brownies, stuffed full of biscuits! This recipe fits right in with March’s MiniMoFo challenge of “stuffed and filled foods” (indeed, bourbons are a filled biscuit, which in this case are then stuffed inside brownies!), and also has some cool alliteration in the recipe title.

brownies1

Have you ever had a Bourbon Biscuit? If you’re not British, then maybe not. Bourbon biscuits are a rectangular cocoa biscuit with a chocolatey filling. If you’re American, the closest you can get would be a chocolate cream filled oreo, they’re different, but they’d work the same in this recipe. Bourbons do not actually have anything to do with the drink, bourbon, and are quite non-alcoholic, being a favourite to dunk into a cup of tea. Many supermarket versions are vegan, just check the packet before you buy!

brownies

These brownies use bourbon biscuits much like other brownies use chocolate chips. The biscuits get chopped up (surprisingly easy to do) and stirred into the batter, with a few placed on top before baking. They’re super chocolatey and great for fans of the popular biscuit!

Bourbon Biscuit Brownies

  • Servings: 20 brownies
  • Print

Ingredients

  • 200g bourbon biscuits, chopped into roughly 1cm pieces (with a few reserved to top the brownies)
  • 100g vegan butter
  • 50g dark chocolate
  • 225g sugar
  • 1 tsp vanilla
  • 50g cocoa
  • pinch salt
  • 1/2 tsp bicarbonate of soda
  • 1/2 tsp baking powder
  • 175ml milk of choice
  • 300g plain flour

Directions

    Preheat the oven to 170C/340F and line a baking dish
  1. In a large bowl, melt together the butter and chocolate.
  2. Add the sugar, vanilla, cocoa, salt, and bicarbonate of soda, and mix well.
  3. Stir in the milk until well combined.
  4. Add the flour and mix through.
  5. Fold in the chopped bourbon biscuits until evenly distributed.
  6. Pour the batter into your prepared tin, and top with the remaining biscuits.
  7. Bake in the preheated oven for 25-30 minutes, until a knife comes out clean.
  8. Cool in the tin, then slice and eat!

Pizza Sausages

Ah, February. Christmas is over, the new year is over, and it’s absolutely freezing cold. Spring is not yet on the radar, so the best thing to do is to sit tight in the warm and try not to shiver ourselves away.

The VeganMoFo challenge for the month is “Red” – to make and eat food all with the theme of red. This meal did not come out quite as red as I had planned, but it is still a bit red and certainly delicious.

sausages2

These sausages are adapted from my tomato & basil sausage recipe, but these are flavoured to taste like pizza. Aptly, today is apparently National Pizza Day, which I didn’t actually plan for, but it works! Stuffed full with sun-dried tomatoes, olives, basil, and nutritional yeast, these sausages have a definite pizza flavour to them and smell and taste wonderful!

sausages3.jpg

As with the other sausages on my blog, these are made with vital wheat gluten (you can buy it from health-food or vegan shops) and first steamed, then fried to get a lovely crust. Sausages made with gluten hold their shape very well, making them also ideal if you fancy barbecuing them!

Pizza Sausages

  • Servings: 8 sausages
  • Print

Ingredients

  • 60g sundried tomatoes (the kind that come in oil), finely chopped
  • 50g black olives, finely chopped
  • 30g fresh basil, finely chopped
  • 1 can white kidney beans/cannelini beans
  • 4 tbsp tomato puree
  • 1 tsp dried oregano
  • 1 tsp garlic powder
  • 1 tsp onion powder
  • 1 tsp salt
  • 1 tsp sriracha
  • 4 tbsp nutritional yeast
  • 225g vital wheat gluten
  • 225ml cold water

Directions

  1. Begin by mashing the white beans in a large bowl until thoroughly mashed.
  2. Stir through the remaining ingredients to make a dough.
  3. Knead the dough for just a minute until it all comes together and forms a cohesive mixture.
  4. Divide the dough into 8 pieces, and roll each one into a rough sausage shape. Don’t worry too much about the shape – they’ll expand as they steam.
  5. Wrap each sausage in tin-foil, like a Christmas cracker shape.
  6. Place the sausages in your steamer (you may have to do two batches if your steamer is not large enough).
  7. Steam for 40 minutes.
  8. Once the sausages are steamed, remove them from the steamer, allow to cool slightly, then unwrap the foil.
  9. To fry, pour a little oil into a hot pan and fry the sausages for a minute or two on each side, until golden in colour.
  10. The sausages freeze well if you have too many!